
First steps with Git
Introduction
This tutorial aims to get your feet wet using the Git terminal to manage your files locally and understand how to send these to GitHub.
To illustrate each step, I use the visualizations provided by the web page Visualizing Git. Highly useful for understanding Git and what it does!
Downloading Git
NOTE: This is only required if you don’t already have git installed on your computer. You can check this by running git --version. If installed properly, this should give you a version message.
git --version
> git version 2.17.1
If installed properly, proceed to Creating a new repository.
If not installed, navigate to https://git-scm.com/ and find the download for the system you are using. Carry through the installation.
Getting help
All Git commands follow the structure: git <command> <options>. If you need further help about any command, use the --help flag. For instance, if you are unsure about how to use the command git add, then run:
git add --help
> GIT-ADD(1)                        Git Manual                        GIT-ADD(1)
>
> NAME
>        git-add - Add file contents to the index
>
> SYNOPSIS
>        git add [--verbose | -v] [--dry-run | -n] [--force | -f] [--interactive | -i] [--patch | -p]
>                  [--edit | -e] [--[no-]all | --[no-]ignore-removal | [--update | -u]]
>                  [--intent-to-add | -N] [--refresh] [--ignore-errors] [--ignore-missing] [--renormalize]
>                  [--chmod=(+|-)x] [--] [<pathspec>...]
> ... (more lines)
Further, in most cases other people will have encountered the same issues. Google and in particular StackOverflow are wonderful places to look for help.
Finally, don’t hestitate to ask for help if you after trying out the above approaches still are stuck :)
Creating a new repository
When we start a new project, we start creating a new folder (mkdir PythonHelloProject). At this point, Git is not involved - we have only made a new folder in our file tree.
We navigate into the folder, and then initialize a new repository using the command git init. This action creates a hidden folder .git inside the PythonHelloProject. Now Git will track what is happening within this folder.
mkdir PythonHelloProject
cd PythonHelloProject
git init
> Initialized empty Git repository in /home/jakob/PythonHelloProject/.git/
Exercise 1: Create an empty folder, and initialize a Git repository within it.
Creating and adding your first two files
Here, we will go through the steps of adding new files to our repository. This is a three-step procedure:
- Create a new file (Git is not involved here).
- Add the newly created files to the Git stage, selecting those to include in the next commit.
- Commit the staged files, creating a snapshot where these files have been included. This is now stored in the ‘memory’ of Git.
Including the first file in the history
First, we create a Python hello-world script. You can edit the text file in any raw text editor of your choice (meaning text editors such as gedit or vim on Linux, or Notepad or Notepad++ on Windows - Word document does not work, as this is not raw text documents).
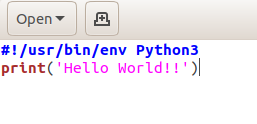
We can inspect how the file looks using the cat command, printing its content. At this point, Git is not involved.
cat hello_python.py
> #!/usr/bin/env Python3
> print('Hello World!!')
We can check the current status of the Git repository by running git status. In this case, we see that Git notices that there are new files added, which are not part of the current history. Run git status frequently when using Git, so that you know what is going on!
git status
> On branch master
>
> No commits yet
>
> Untracked files:
>   (use "git add <file>..." to include in what will be committed)
>
> 	hello_python.py
>
> nothing added to commit but untracked files present (use "git add" to track)
Here, we see that Git notices that there is one untracked file “hello_python.py”. We add this file to the staging area using the command git add. This command is used to select what file or files to be included in the next commit. This is a preparation step - nothing has been committed to the history yet. Files can be staged (git add) and unstaged (git reset) until you are satisfied.
git add hello_python.py
We are ready to create a commit and make new history.
git commit -m "first commit"
> [master (root-commit) ee89d19] first commit
>  1 file changed, 2 insertions(+)
>  create mode 100644 hello_python.py
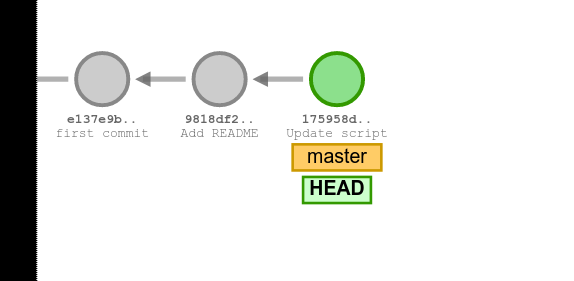
At this point, our Git history looks the following way:
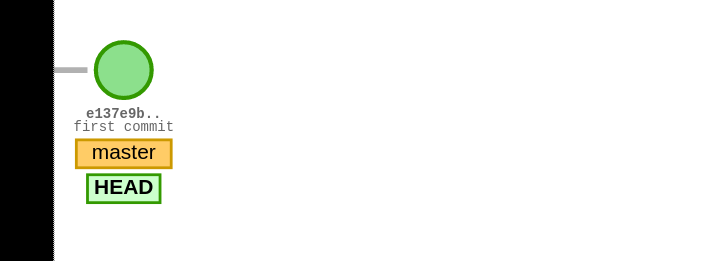
We have one commit. The “master” is the name of the current branch we are working on. The “HEAD” points to the commit we are currently inspecting in the Git repository. Further, you see the ID of the commit (e137…) and the message describing what was done.
Exercise 2: Create a new file locally in your repository, and commit it to your Git history.
Creating and including the second file
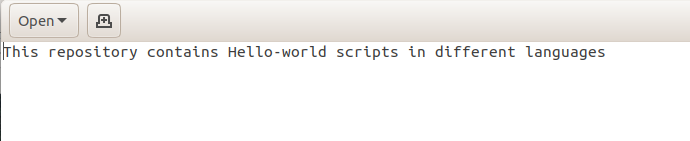
Secondly, we also include a README file.
We create a new file through a text editor. I saved this text into a file named README.md.
Next, we add the second file to the stage, preparing it to be committed.
git add README.md
We create a second commit, including this file in the Git history.
git commit -m "Add README"
> [master 5724d25] Add README
> 1 file changed, 1 insertion(+)
> create mode 100644 README.md
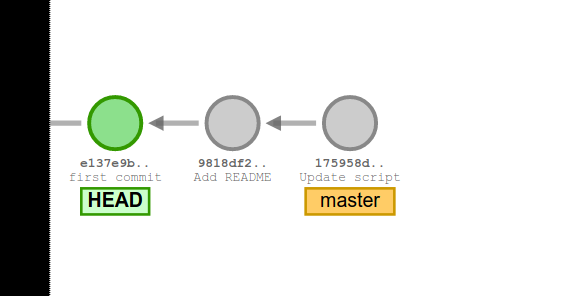
The repository at this stage can be illustrated in the following way. Here, the HEAD points to the version we are looking into, and the master (or main) points to our main branch.
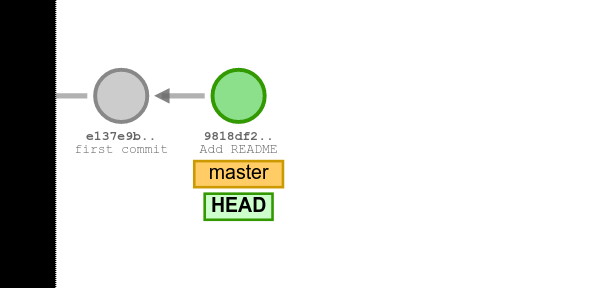
We can inspect the history at this point using the command git log. Compare the output to what is shown in the figure above.
git log
> commit 5724d2592a13b32ca7256d8cd4cb31a275f9af22 (HEAD -> master)
> Author: Jakob Willforss <jakob.willforss@hotmail.com>
> Date:   Sun Oct 11 15:57:33 2020 +0200
>
>     Add README
>
> commit ee89d19ee6eab220f92f37f2016ca9cf34f7b08f
> Author: Jakob Willforss <jakob.willforss@hotmail.com>
> Date:   Sun Oct 11 15:56:59 2020 +0200
>
>     first commit
Exercise 3: Create a second file in your repository and commit it.
Updating existing files
Now we know how to add newly created files to the Git repository. Beyond this, we can also commit modifications to the history and the removal of files. Here, I will demonstrate how we can commit changes made to a file to the history.
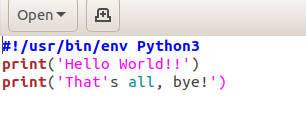
We update the existing Python-script by appending a second line - saying “bye”.
echo "print('That's all, bye!')" >> hello_python.py
As before, check the status.
git status
> On branch master
> Changes not staged for commit:
>   (use "git add <file>..." to update what will be committed)
>   (use "git checkout -- <file>..." to discard changes in working directory)
>
> 	modified:   hello_python.py
>
> no changes added to commit (use "git add" and/or "git commit -a")
git add hello_python.py
git commit -m "Update script"
Exercise 4: Make changes to one of your files, and commit these changes.
Exercise 5 (optional): Add a third file, and commit this to the repository. Subsequently remove the same file and commit the removal of this file. Check the git log and ls (to see your files). Is the file still there or not?
Moving back and forth in history
One of the powerful features of Git is that we, at any point, can go back to any previous snapshots. By doing this, the file tree (the files we see on our computer) changes into the state the files were in at that point. This allows us to, for instance, explore how our scripts looked before introducing bugs.
By using the command git log we can see the history, and the commit IDs related to each step.
git log
> commit 5724d2592a13b32ca7256d8cd4cb31a275f9af22 (HEAD -> master)
> Author: Jakob Willforss <jakob.willforss@hotmail.com>
> Date:   Sun Oct 11 15:57:33 2020 +0200
>
>     Add README
>
> commit ee89d19ee6eab220f92f37f2016ca9cf34f7b08f
> Author: Jakob Willforss <jakob.willforss@hotmail.com>
> Date:   Sun Oct 11 15:56:59 2020 +0200
>
>     first commit
Using the first part of the ID is one way to access that commit (for instance 5724d25, normally a few letters is enough, but if using too little, for instance 572, Git may not be able to uniquely identify the commit).
Next, you can checkout the previous commit.
git checkout ee89d19e
> M	hello_python.py
> Previous HEAD position was 5724d25 Add README
> HEAD is now at ee89d19 first commit
If we check the log from here, the history looks different. This is because each commit only is aware of what has happened before it.
> commit ee89d19ee6eab220f92f37f2016ca9cf34f7b08f (HEAD)
> Author: Jakob Willforss <jakob.willforss@hotmail.com>
> Date:   Sun Oct 11 15:56:59 2020 +0200
>
>    first commit
At any point, we can navigate back to the latest commit by using the command git checkout and specifying the head of the branch (either master or main).
git checkout master
> M	hello_python.py
> Previous HEAD position was ee89d19 first commit
> Switched to branch 'master'
Exercise 6: Use the command git log to find the ID of an old commit. Then inspect it using git checkout. Inspect what files are present, and their content. Have you successfully moved in time? Finish with using git checkout master or git checkout main to navigate back to the last commit (the ‘branch tip’).
Sending a repository to GitHub
Setup a new repository on GitHub. Give it a name, and assign it as public. Don’t add the README this time! As you already have files locally, this would create a merge conflict, which would complicate things.
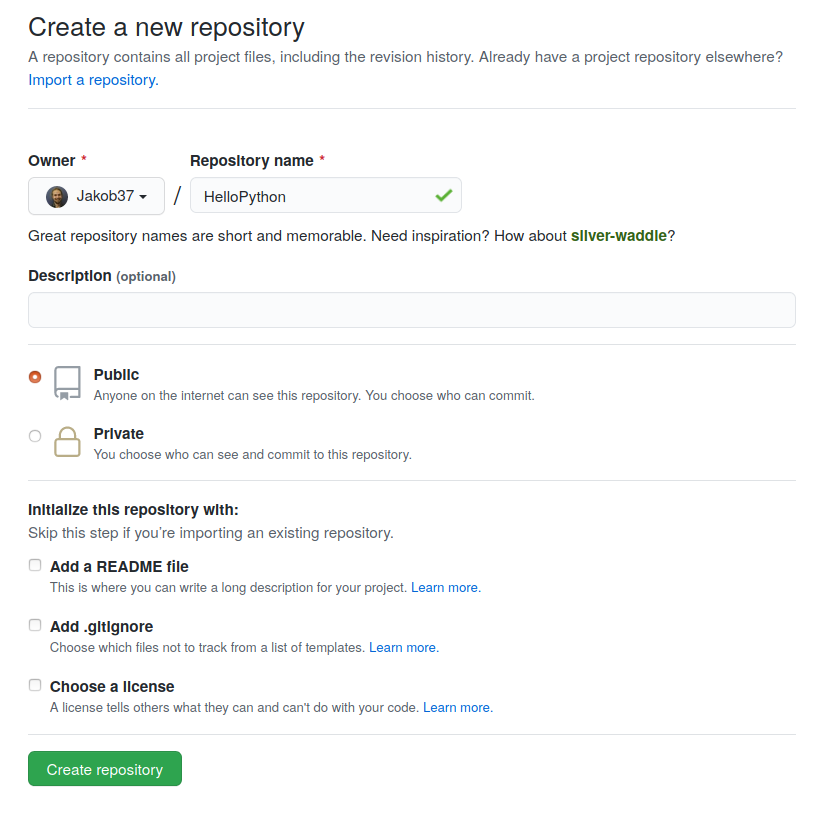
You will come to a page similar to the following. Follow the instructions for ‘push an existing repository from the command line’
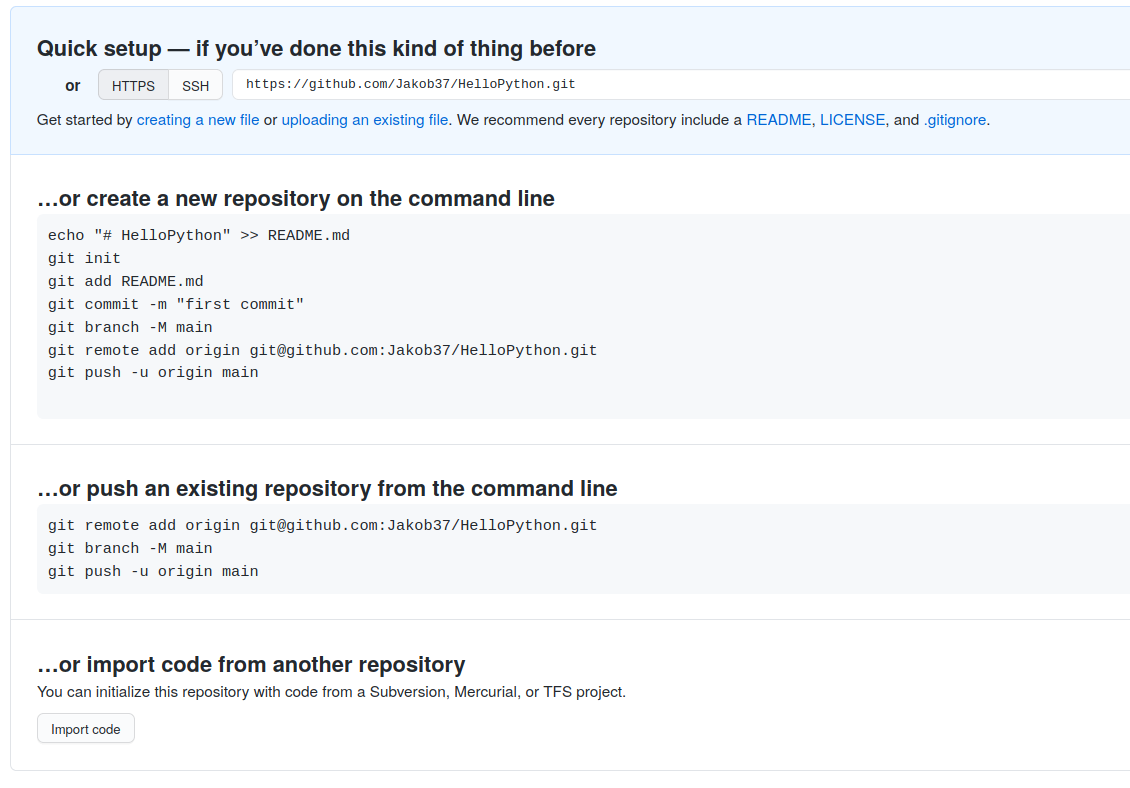
Note that there are two protocols for linking GitHub repositories - https and ssh. Using ssh allows you to interact with GitHub without using a password every time, but requires you to set it up properly. Instructions for this are found here. Using the https protocol works well, so don’t worry about it.
Adapt the command below accordingly - Replace “Jakob37” with your user and “HelloPython” with the name of your repository!
git remote add origin https://github.com/Jakob37/HelloPython.git
git branch -M main
git push -u origin main
After this, whenever you make local changes, you can send them to GitHub using git push. You can also retrieve changes made remotely using git pull (Git will complain if you try pushing changes when there are updates made on GitHub).
Exercise 7: Create an empty Git repostory on GitHub, and send your local repository to GitHub.
A note on merge conflicts
The likely most tricky part of Git when getting started using it is merge conflicts. These can be resolved with relative ease if knowing what they are. In brief, they are caused by making changes in parallel to the same files. Someone needs to choose which changes to use after that!
To learn more about merge conflicts, you can read this link, written by GitHub.
Concluding words
This tutorial only provides a teaser for the functionality of Git. By putting some more time into working through a workshop, you will have a powerful and useful tool at your disposal. I would strongly encourage you to start using Git in your next coding- or analysis-project, and gradually get used to it. When proficient, you will have the full benefit of Git with very little effort.
Some resources for further reading:
- My Git hands-on materials, one-day workshop materials which can be used independently: link
- Free and interactive online tutorial to get started with Git: link
- Non-free, but great and comprehensive tutorial at DataCamp: link
- For a deeper understanding of what goes on ‘under the hood’, I recommend this post: link